Chapter 4: A Romantic Seating Area
From Lawn to Legendary Dark Romantic English Fairytale Garden
I’m transforming my seemingly normal south suburban backyard into a Dark Romantic Fairytale Garden and I’m bringing you on this adventure with me.
It’s early in the evening on a long summer day. The sun is deep and setting fast. The last of the day’s strong golden rays of suddenly light burst forward blanketing the garden with in a veil of intense golden light. The garden ignites in a burst of colors of rich pinks and oranges, sultry reds, and deep oceanic blues and purple so dark they’re nearly black. The sun then fully sets, setting the sky into a rage of color. Evening settles in. Tiny pin pricks of fairy lights begin to glow all around the garden, the soft cast of each glowing light teases petals and every leaf it touches. A cool breeze rolls along the garden path, spreading the intoxicating scent of jasmine, lilacs, and rich roses. The moody garden comes to life, becoming the perfect setting for a dark romantic fairytale.
Er, rather that’s what I envision my garden to be: a Dark Romantic English Garden worthy of fairytales.
As someone who truly believes magic isn’t just for storybooks, I’m on a journey to weave Dark Bohemian Fairytale Romance into every aspect of my life, starting right here in my cottage I share with my husband, Max, and our Pomeranians, Aokū (Ow-Koo) and Louie, deep within the suburbs of Chicago.
Today I’m sharing the next step of transforming my seemingly normal, small suburban back yard into the Dark Romantic English Garden I’ve read about in fairytales. In this next phase, I’ll be sharing the expansion of our patio space and installation of a romantic seating area perfect for reading, enjoying an evening glass of wine, or musing over my next adventure.
Be sure to catch up with this story
Chapter 1: My Dream Dark Romantic Fairytale Garden Begins
Chapter 2: Choosing My First Blooms: English Border and Cottage Garden Classics
Chapter 3: Installing a Dark Romantic English Border Garden
At this stage in my life, I’ve learned that creating beauty around you is a powerful act of self-care and joy. I’m also old enough to realize that when you dream of something for several years, it’s time to put yourself first and finally take action to make dreams a reality. After coming home from my long 9-5 job, I want to smile as I step into my magical space where I enjoy unleashing my creativity and romanticize everyday living.
The Inspiration and Vision
The Romantic English Border Garden installation is complete and now it is time to move forward with the next step in my backyard transformation series: Expanding the patio area and installing a small romantic and cozy seating area.
My vision for a romantic and cozy seating area begins with the feeling of being immersed in the garden, to be eye-level with gorgeous blooms yet close enough to our cooking station to tend to foods being prepared so they do not burn. Since we entertain quite often in warmer months, having additional seating in our patio space is not just a must, but is also something we have desired to plan out for a few years now. We have every intention to continue hosting larger gatherings and we know it’s certainly time for the patio space to be expanded to accommodate our guests.
Drawing Out the Space for the Patio Expansion
The current patio area holds a narrow 10-person outdoor dining table, our smoker, and our charcoal grill. When we are entertaining guests outdoors and cook on the grill or have the smoker going at the same time, there’s very limited space for people to stand up and walk freely without feeling cramped. People are required to time their movements to and from the dining table to the indoors. Having to execute calculated walking times in order not to get too close to the cooking station while it’s in use has become cumbersome and as a hostess, a bit embarrassing. Guests being able to have enough space to comfortably navigate the dining table area when one wants without fear of being burned while cooking station is in use is the true goal with the patio expansion.
By continuing the natural curve of the small patchy grass area that is adjacent to the current patio space, the expanded area will have a more natural movement and flow of the back yard in whole. Once the patio expansion is completed, the intention is to have an adjacent seating space that appears as if the entire patio area was installed at the same time and not four years apart.

A “Before” image of our small gravel patio space. Here you can see how cramped the 10 person outdoor dining table is with the fire pit and smoker nearly right next to the dining table.

Here’s another “Before” image with the planned layout of the patio expansion as well as where the seating area will go. As you can see, the expansion will add a large amount of space for people to freely move about the patio.
The First Steps: Prepping the Area to be Ready for Patio Expansion Installation

The patchy area of grass will need to be prepped before any barrier is laid down for the gravel to be placed on top. This will require quite a bit of grass to be removed and set aside as filler for the raised herb garden in a future project. Aokū will likely miss her “snack spot” but will will have a fresh new space to enjoy treats in the new space.
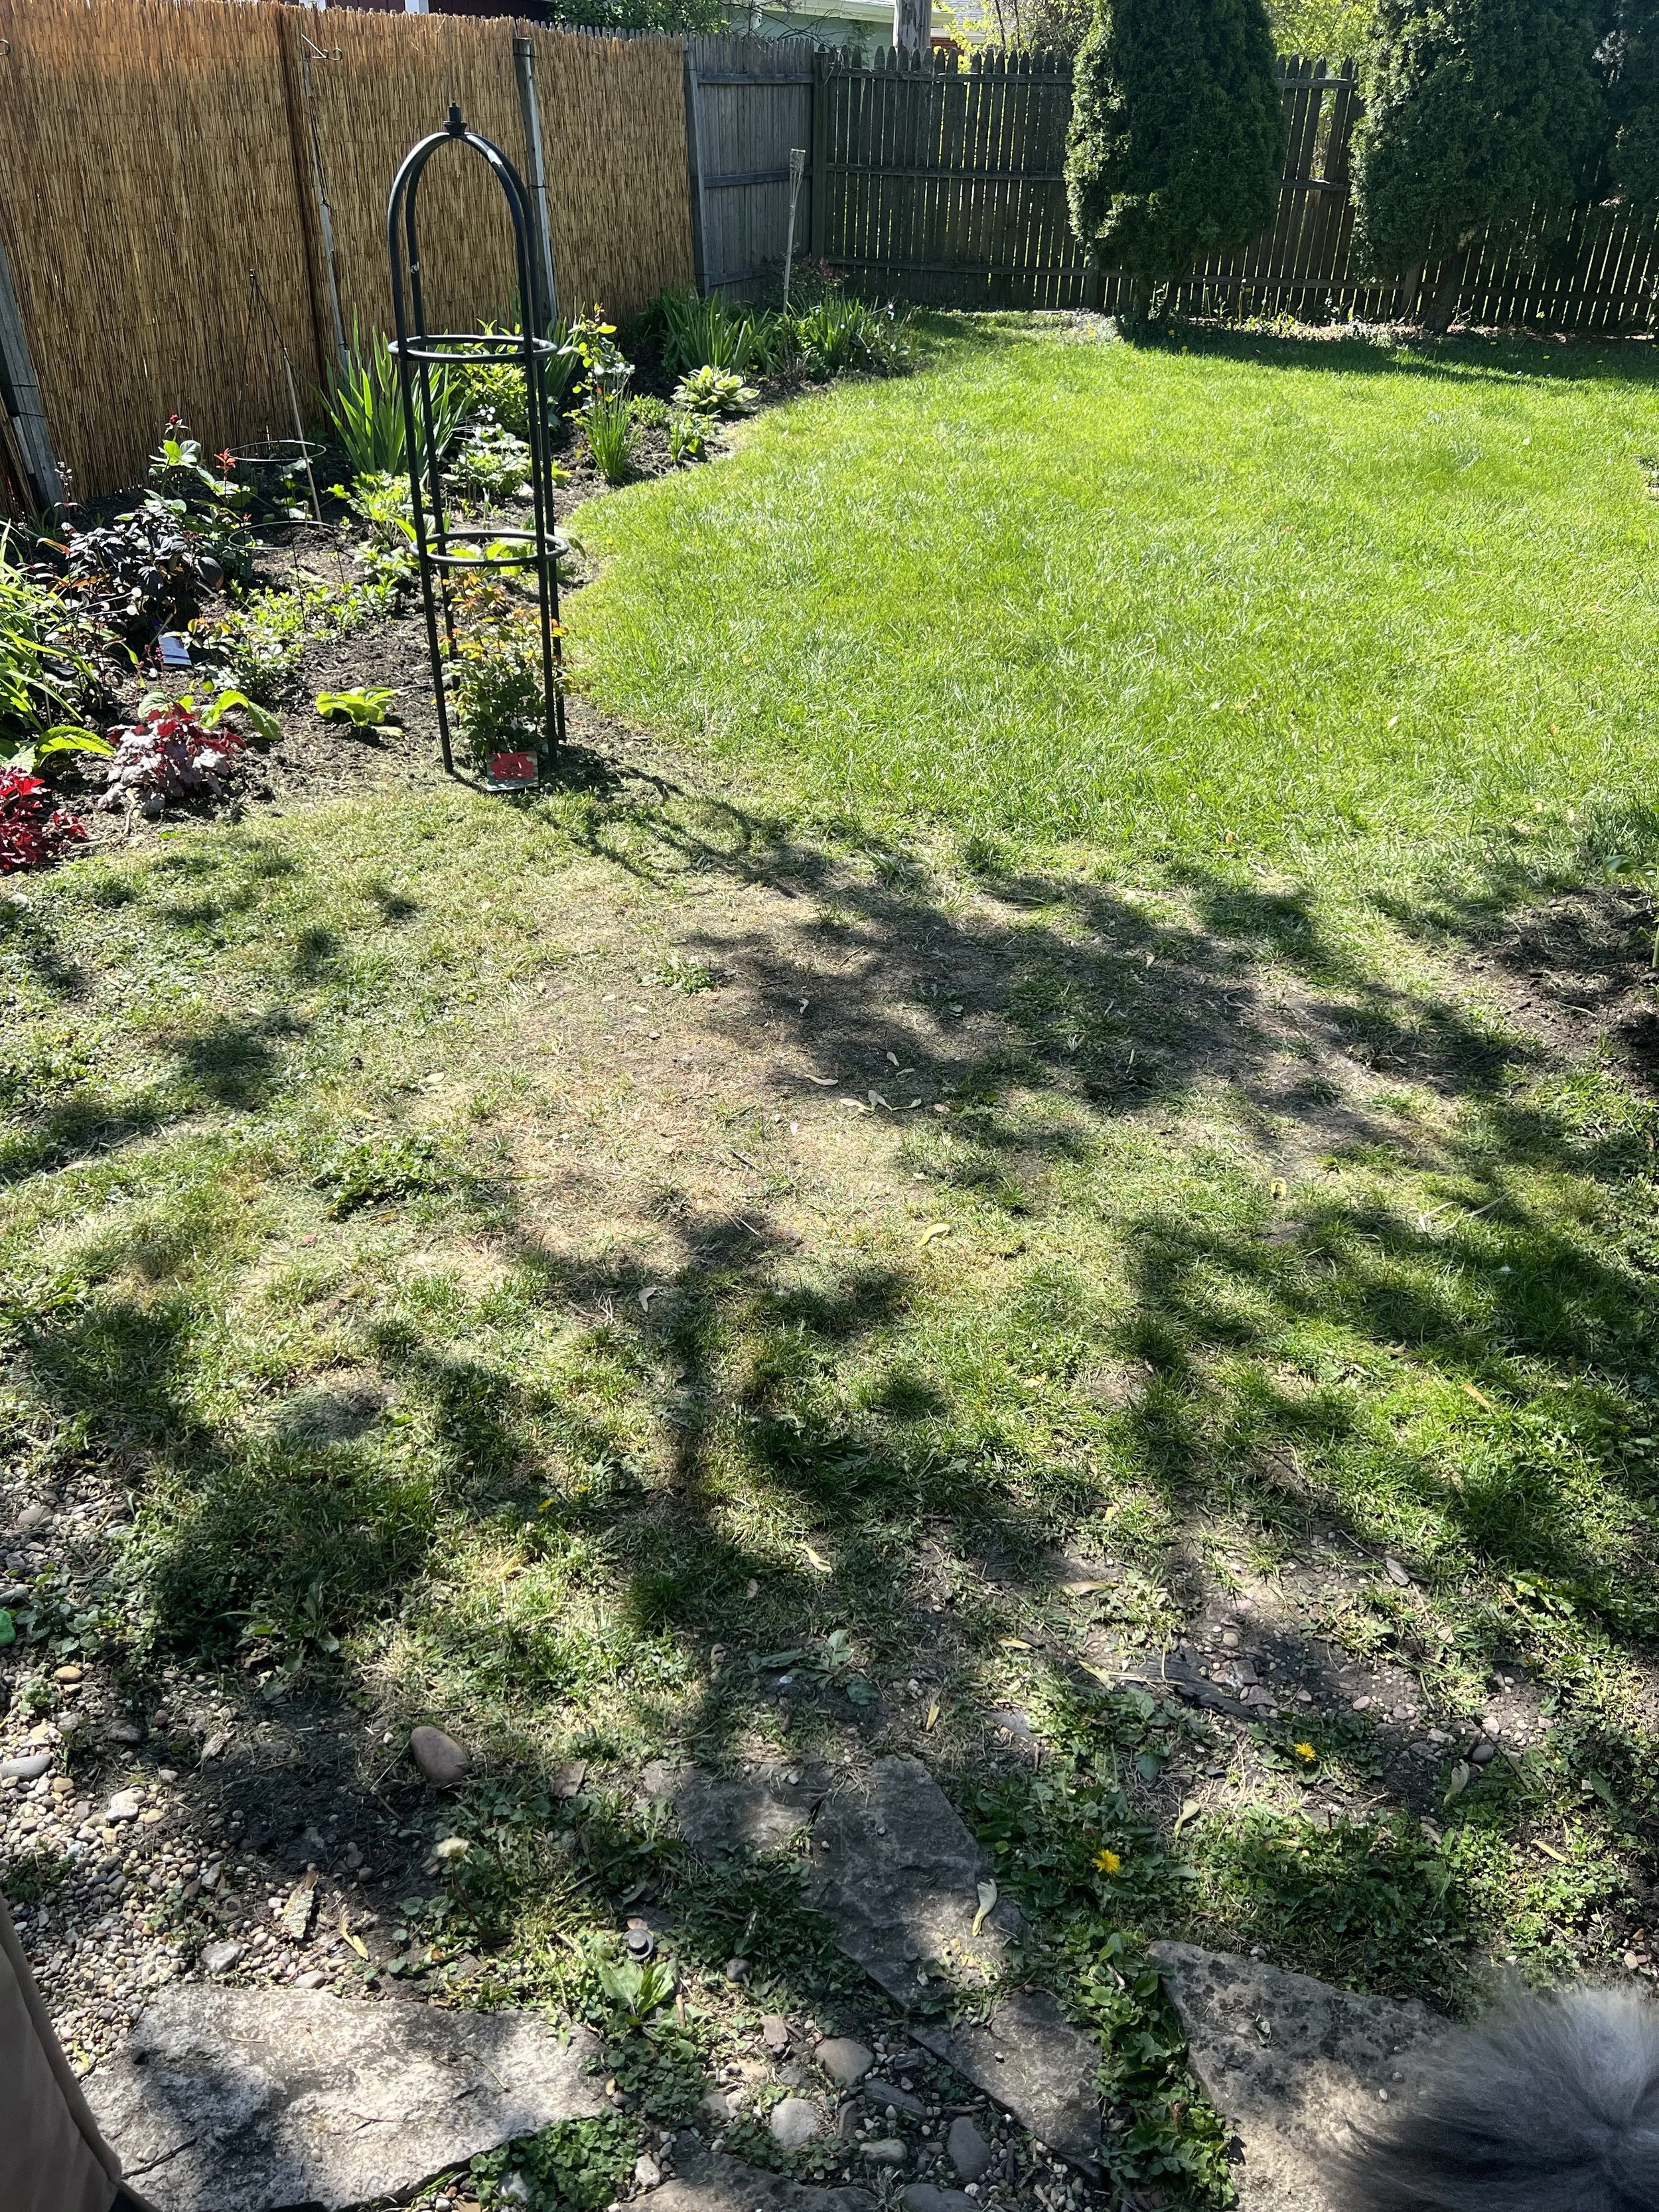
Here’s an overview of the area of grass adjacent to our small patio space. The grass has been removed with a trimmer and grass taken down to the dirt. The flagstones that make up this “gateway” into the garden will be repurposed for the border of the patio.
Next Step: Creating the Patio Border and Laying Down Gravel
Then it was time to lay down a barrier for the gravel to be placed upon. Sheets of barrier were laid out first, then flagstone placed on top as the border of where the gravel will meet the Border Garden. Where the barrier sheets overlapped, yard staples were applied every few feet to help keep the barrier below the gravel as the area would be heavily traversed. River stones were places on the interior side of the flagstone border to help prevent the gravel from escaping the patio space. Once the barrier sheets were secured and the stone border was placed, it was time to fill in the patio with gravel. I initially budgeted 22 bags of gravel but once they were all emptied onto the barrier, I quickly learned I greatly miscalculated the amount of gravel bags I would need. The extended space ended up needing a total 37 bags!


As soon as all of the bags of gravel were laid down, a massive storm hit our home. Our maple tree that was once full of samaras had been liberated of them all at the same time…which ment that every single samara now covered our brand new patio space. Not wanting to be mocked by mother nature any further, I purchased a leaf blower to remove the samaras which worked beautifully. In hindsight, I wasn’t sure why I had waiting so long to get a leaf blower in the first place.


Step Three: The Patio Seating Area
Up until this point I was not certain if my ideal seating set I had picked out months ago online was still available or if it would even fit in the new patio space. I rearranged the smoker and grill to create a cooking station and took measurements of the remaining space available that would be the seating area. Thankfully there would be enough room for the small bistro patio set I had my heart set on. I was equally grateful it was still available as well. I ordered a small black metal bistro set with a bench, table and two chairs. I loved the black metal roses and vines with bronze hi lights that adorned the backs and legs of each piece. They were perfect for the romantic garden theme I had been aiming for.
The Final Touches: Placing the Bistro Set and Styling Potted Plants
I decided to arrange the bistro set in a manner where I would be close to the garden while being in shade at any point in the day. The bench was placed against the Border Garden adjacent to the patio. One chair was placed at the north end of the bistro table and the other chair at the northwest end for best views with the border garden as a focal point.

The Bistro Set placed with potted plants next to the Romantic Border Garden creates the perfect romantic seating area.

By placing the bench against the western border of the patio next to the Romantic Border Garden allows one to feel immersed in the garden. The towering cosmos, climbing “Tess of D’Urbervilles” roses from David Austen, and the zebra grass adds to the coziness of the space.
I brought out my entire collection of pots and filled them with an assortment of whimsical annuals. Pots were placed on either side of the bench at varying heights thanks to plant stands. I really enjoy how the potted plants bring the garden even further into the patio space, creating more immersion into the garden.
I decided to plant a Boston Ivy plant along the house behind our cooking area to bring more greenery into the patio space as well. I’m really looking forward to the autumn when the ivy goes from deep green to a fiery red.
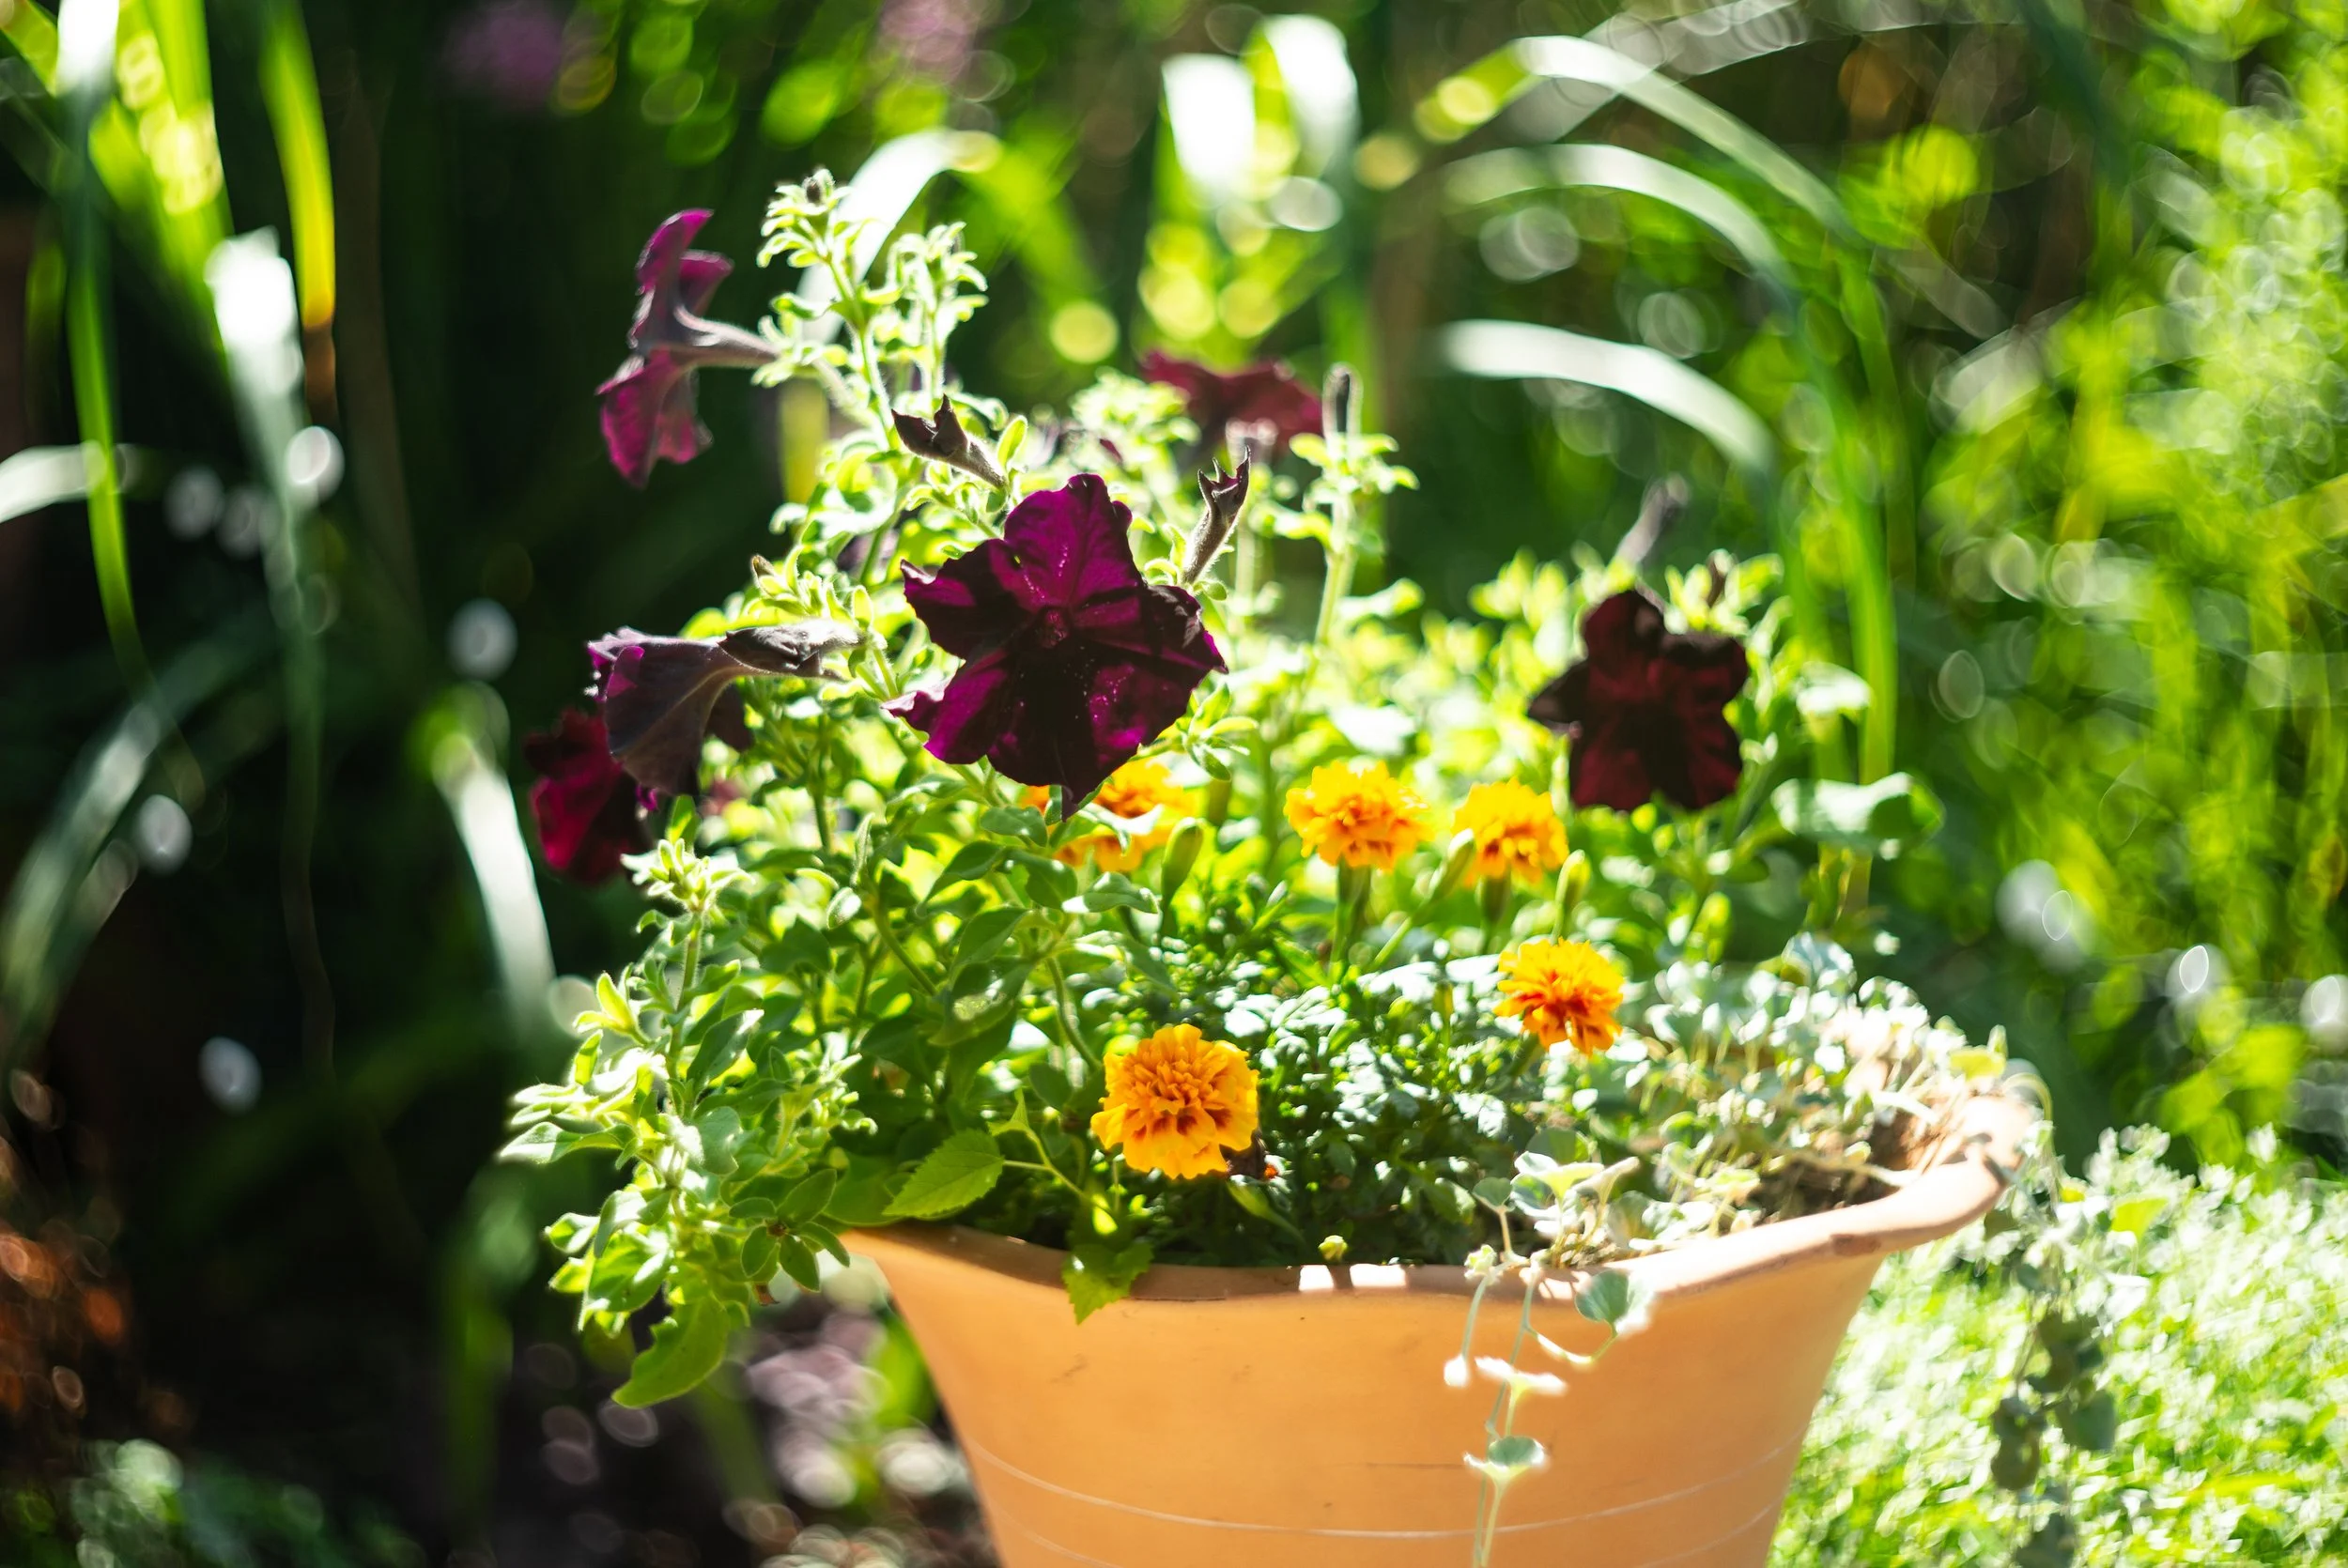
Black Velvet petunias and marigolds fill a terracotta pot, bringing in the dark and rich jewel tones seen throughout the Romantic Border Garden into the seating area and expanded patio space.
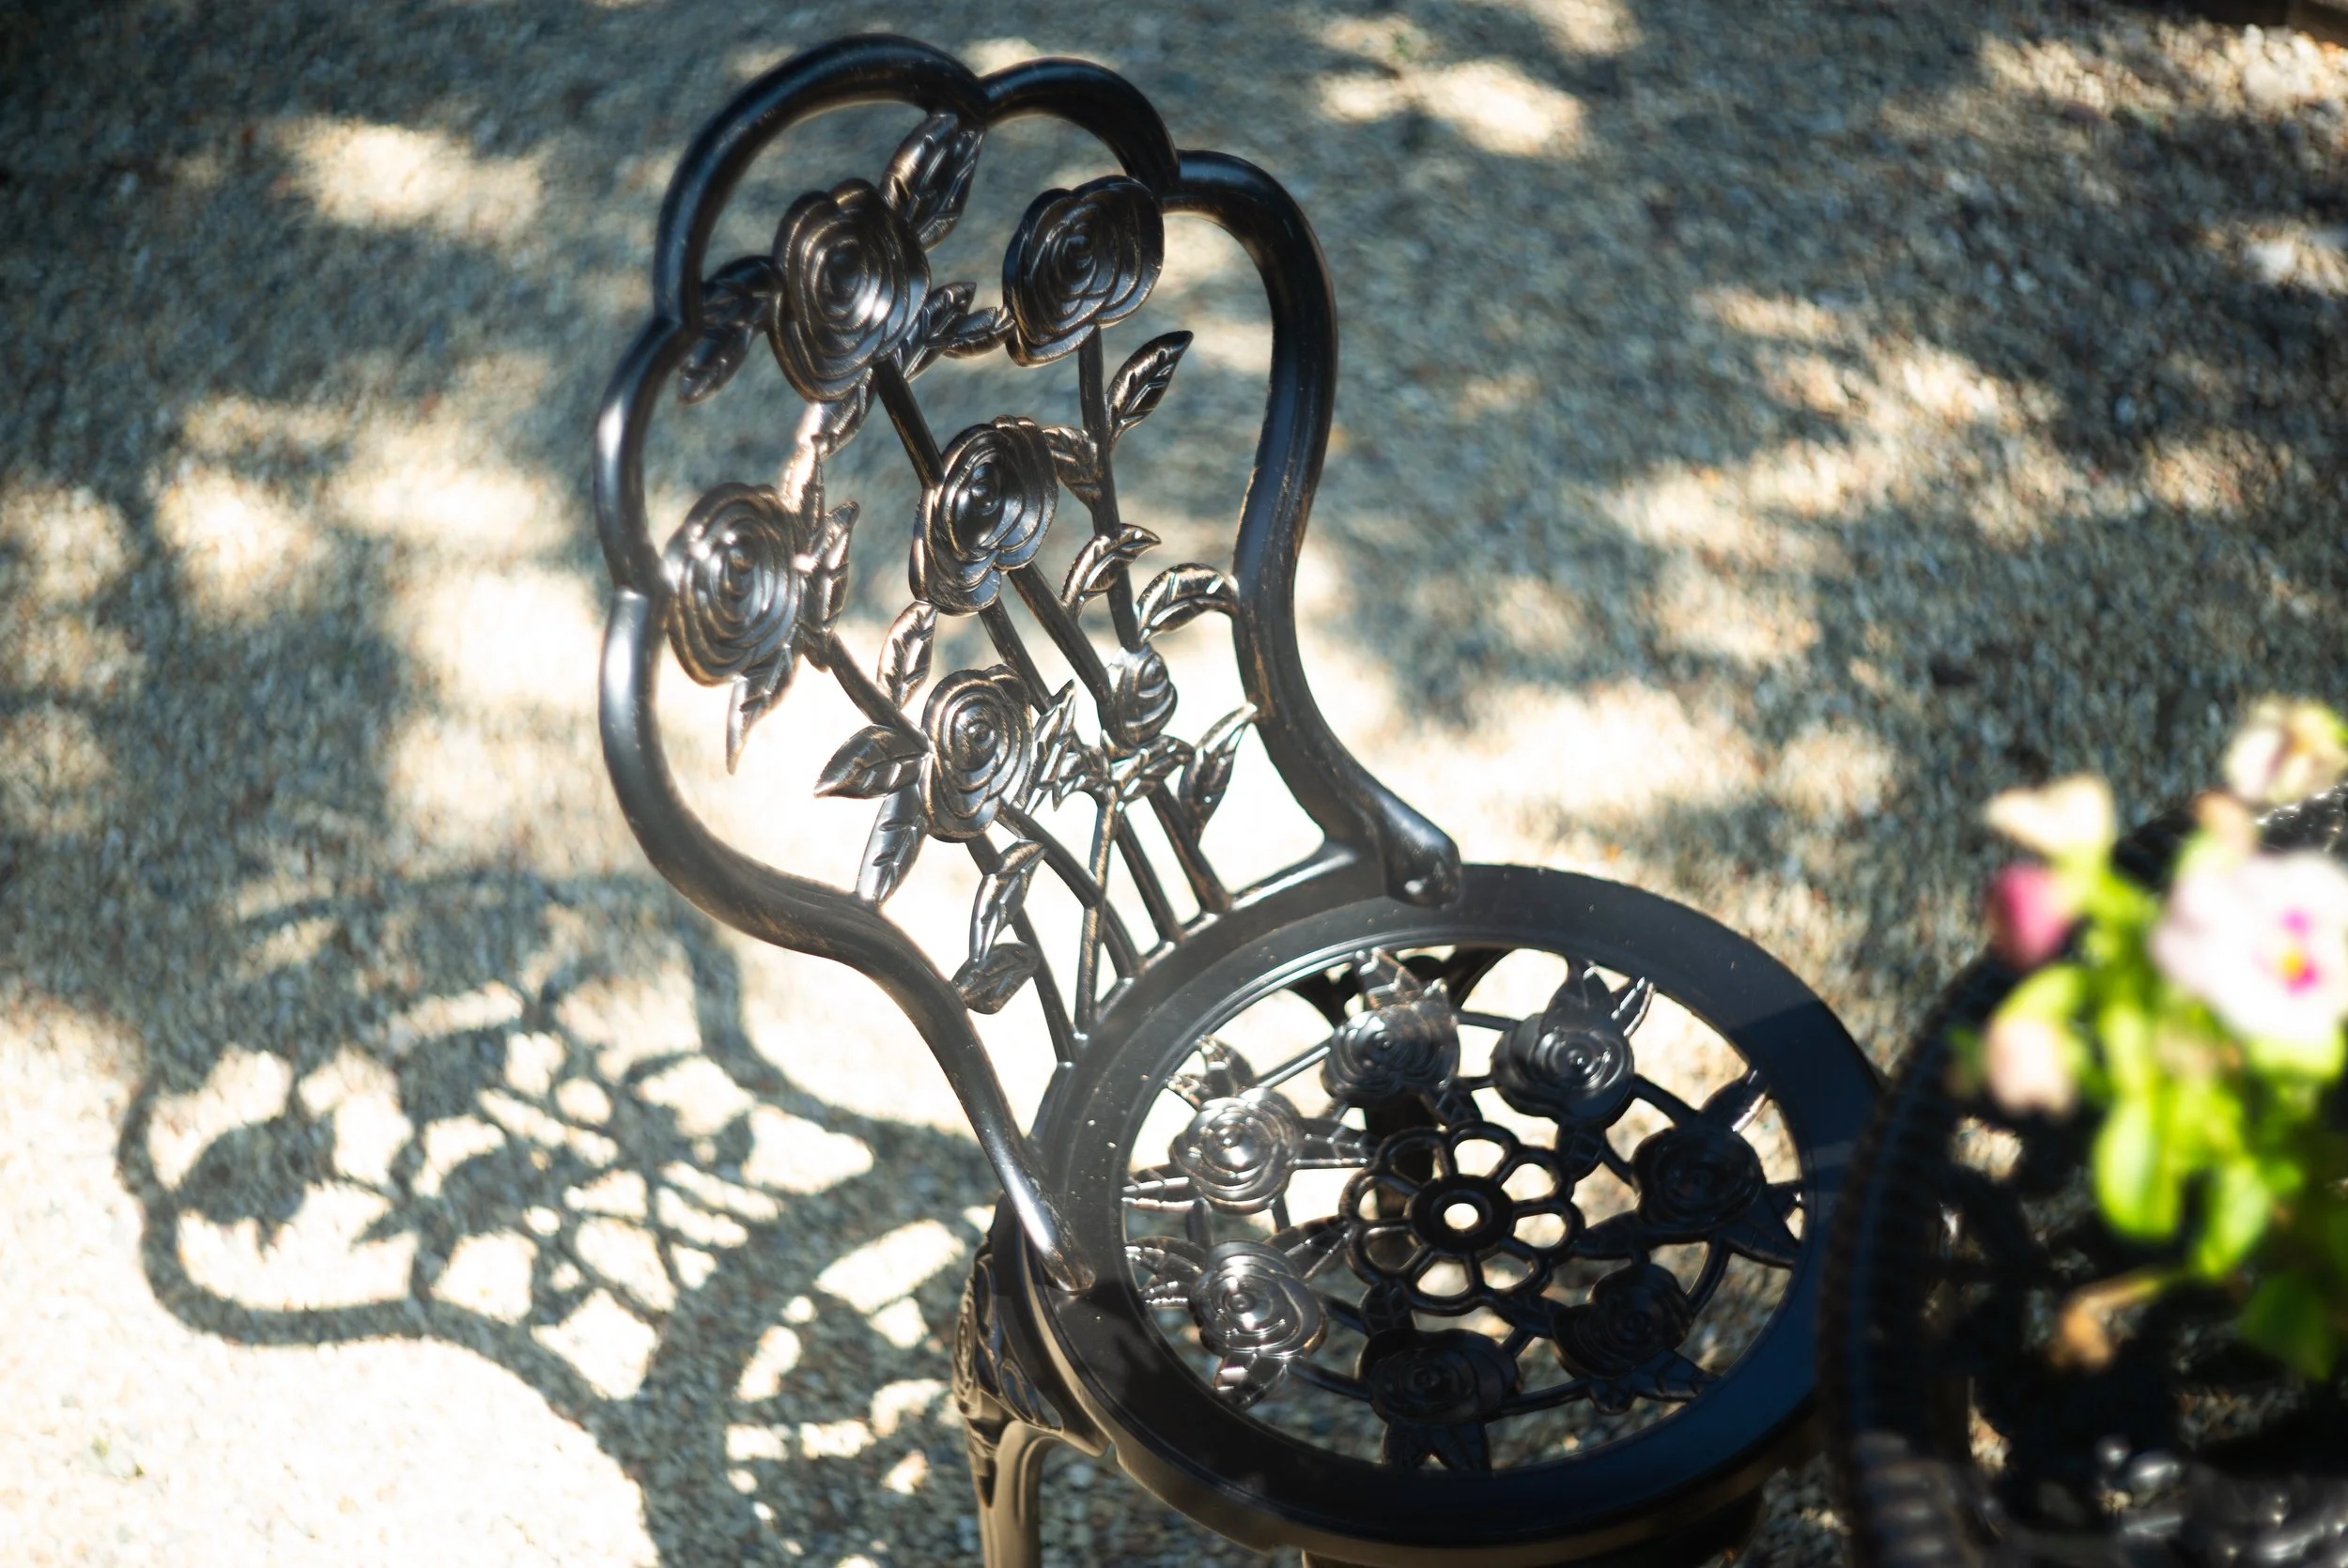
Soft rose details offset the dark iron of the bistro set and add the perfect amount of “Beauty and the Beast” vibes to the seating area.
The Result: A Romantic Seating Area
The result of this project is a large patio space full of function with a little bit of romance. The narrow 10-person dining table and chairs remained from before but the cushions got a refresh with new cushion covers. Potted plants were added to the table to act as florals in vases for a no hassle tablescape. The space where the smoker and grill were previously set along the small previous patio space were rearranged in a functional manner allowing for plenty of space for guests to move about without being crowded. An additional seating area was created with the Romantic Border Garden as a backdrop serving as the perfect place to enjoy reading, an evening glass of wine, and watching the stars at night.


As much as I would like to have my back yard completely transformed in one season, it’s quite possible this will take me the entire year to complete, maybe even longer. All in all, I feel I have a good vision of how I want the backyard to be experienced as well as a plan with practical framework in place for my backyard transformation.
I’m looking forward to continuing this journey of transforming my seemingly normal south suburban backyard into a Dark Romantic Fairytale Garden and I hope you’ll join me!
Until next time, Stay Enchanted!